Hey guys, what’s up?
Since I’ve published my last post I’ve been receiving a lot of questions about how to make cinemagraphs using Photoshop. So I thought it was a good idea to answer to (almost) all of them by making a specific tutorial for it :).
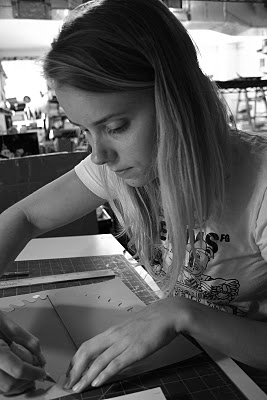
I’ve used Photoshop CS4 in this tutorial, with a video given by the visitor Sheslla, who pulled my ears a lot so I would help her with cinemagraphs :P. Thanks, Sheslla! And congratulations for such a beautiful video which can be seen here:
Click on the images in case you want to enlarge them.
1 – Importing the video to Photoshop.
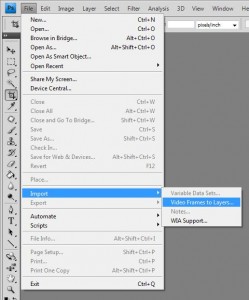
Go to the menu File > Import > Video Frames to Layers.
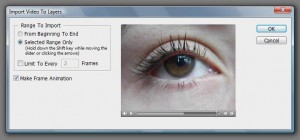
Select the desired video file. A window will show up, in which you may define a range of frames from the video which will be imported as layers into the program. Set up the video “piece” you want, then check the option Make Frame Animation and confirm it.
If the Animation is not visible, then go the Window menu and check Animation. In that panel, layers are seen as frames. The number below them is the duration (in seconds) of each frame in the animation.
2. Aligning frames.
The challenges encountered during the creation of a cinemagraph depend on what you want to do, and the available material you have for it. In our case, one of the problems found was the camera movements during the video recording.
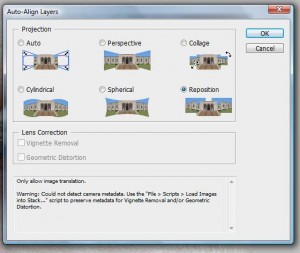
A solution to that is in Edit > Auto-Align Layers. A new window will be opened, with the command options. In our case we just need to Reposition the layers so they’re aligned, and them confirm the operation.
Depending on the dimensions and amount of layers, it may take a long time till the end of the alignment. Go drink a cup of coffee :P.
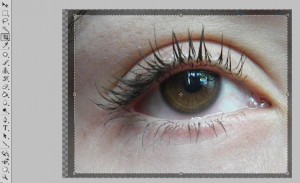
After that procedure, it will very likely be necessary to cut some borders from the image area. It can be done with the Crop (C) tool. Simply select the area you wish to keep and then press Enter.
Press the play button on the Animation panel to check if there are no frames with “empty” areas left. In case there are, use the Crop tool again.
4. Keeping some areas of the animation “static”.
And now the most interesting part! And the simplier :P…
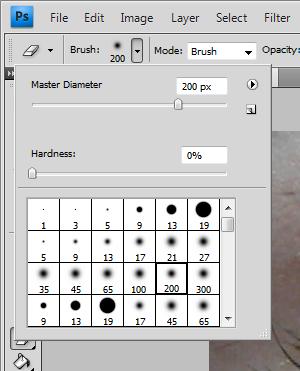
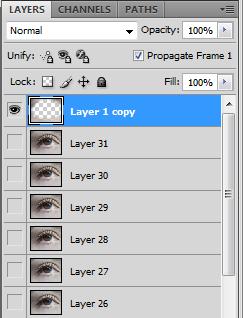
Select the layer which contains the areas you wish to become “static’. Duplicate the layer and put it above all others. Then select the Eraser tool and choose a Brush with extremely soft edges.
Now erase from the duplicated layer the area you wish to “move” during the animation.
Ta-dah! If you have erased everything ok, when you play the animation you’ll see the non-erased areas will look “static” as desired.
5. Final adjustments.
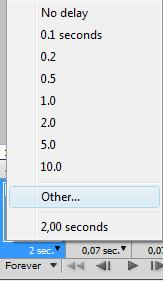
Here we use some other tricks, like removing frames too much similar to the first/last ones and increasing the duration of these (just click twice over the frame and the options will show up).
6. Saving the GIF animation.
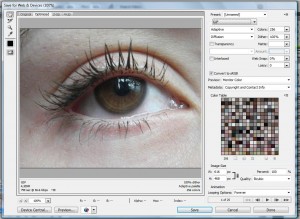
Now you just need to go to File> Save for Web and Devices, select the GIF format, and play around with other settings in case you want to change the quality/size of the end file. When finished, click on Save and select the destination folder.
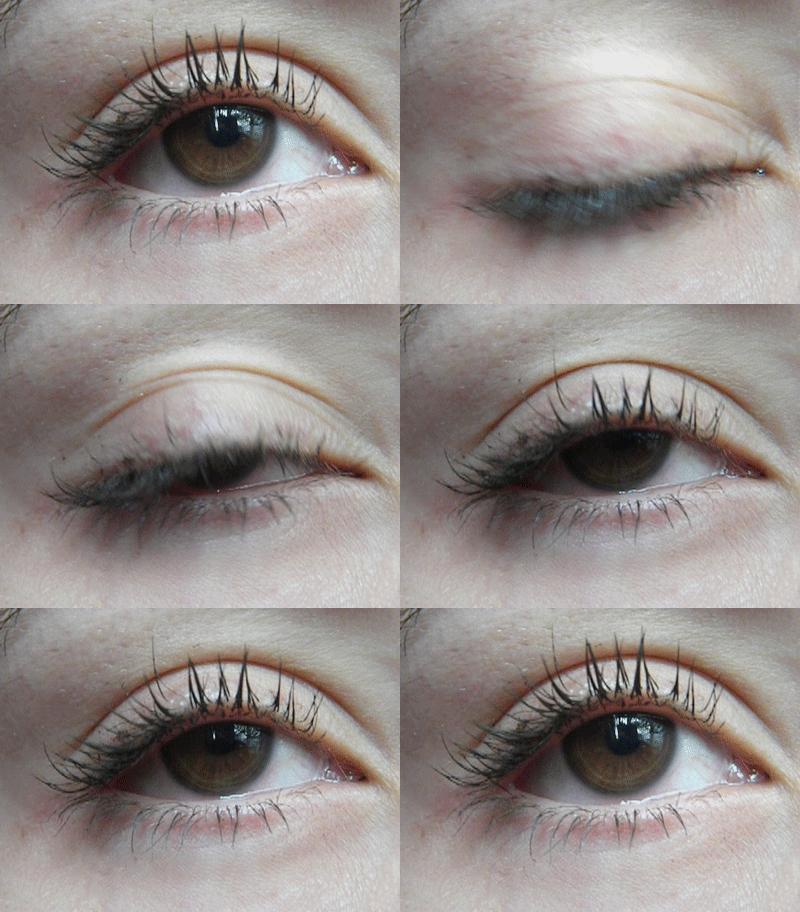
There it is, the magic is done, a cinemagraph :D! Look at the final result:
If you have any questions or suggestions, shoot out, I’m here for that :D!
